
The ASUS TUF X670E Plus WiFi manual is a comprehensive guide designed to help users understand and effectively utilize their motherboard, covering installation, BIOS setup, and troubleshooting.
1.1 Overview of the Motherboard
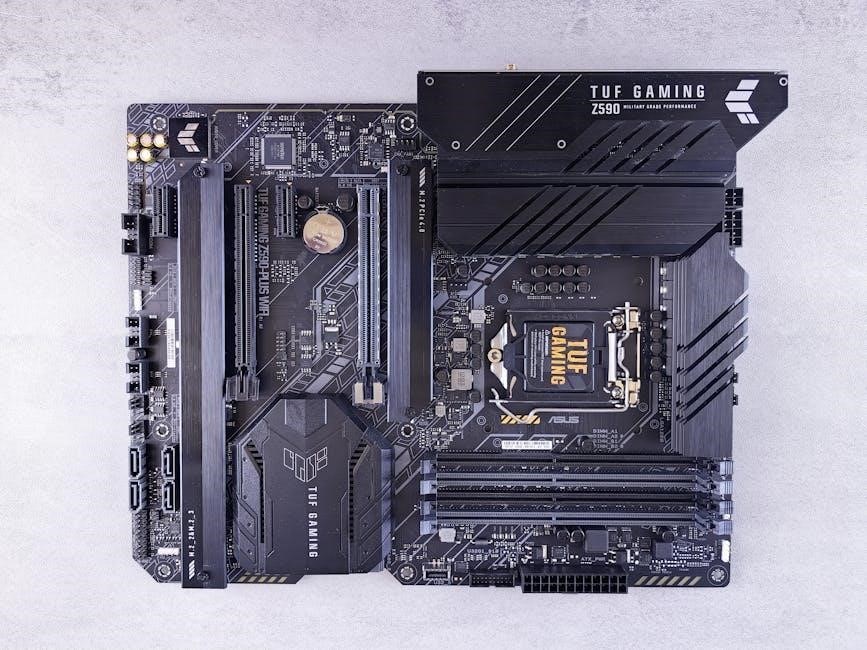
The ASUS TUF X670E Plus WiFi is a high-performance motherboard designed for AMD Ryzen 7000 series processors, offering robust features for gamers and content creators. Built with durability in mind, it features a sleek design, enhanced cooling solutions, and comprehensive connectivity options. The board supports PCIe 5.0, DDR5 memory, and Wi-Fi 6 for seamless performance. Its TUF Gaming Alliance ensures compatibility with trusted components, making it a reliable choice for both casual users and enthusiasts.
1.2 Importance of the Manual for Users
The ASUS TUF X670E Plus WiFi manual is essential for users to maximize their motherboard’s potential. It provides detailed guidance on installation, configuration, and troubleshooting, ensuring a smooth setup experience. The manual helps users understand advanced features, optimize performance, and resolve common issues. By following the manual, users can unlock the full capabilities of their system while minimizing risks of hardware damage or software conflicts. It serves as a comprehensive resource for both novice and experienced users.

Key Features and Specifications
The ASUS TUF X670E Plus WiFi offers AM5 socket for Ryzen 7000 CPUs, PCIe 5.0 for GPU and storage, DDR5 memory support, and WiFi 6E connectivity. It features military-grade components, enhanced power delivery, and comprehensive cooling solutions, ensuring durability and performance for both gaming and professional use.
2.1 CPU Support and Compatibility
The ASUS TUF X670E Plus WiFi supports AMD Ryzen 7000 series processors, leveraging the AM5 socket with PCIe 5.0 for faster performance. It is compatible with CPUs featuring up to 16 cores and 32 threads, making it ideal for gaming and multitasking. The motherboard also supports Precision Boost Overdrive and Precision Boost 2 technologies, enabling superior clock speeds and power management. Its robust power delivery system and VRM design ensure stable performance for overclocked CPUs, while maintaining efficient thermal control.
2.2 Memory (RAM) Support and Configuration
The ASUS TUF X670E Plus WiFi supports DDR5 memory with speeds up to DDR5-6000 MHz. It features four DIMM slots, allowing for a maximum capacity of 128GB when using compatible modules. The motherboard supports dual-channel memory configurations for enhanced performance. Users can enable XMP profiles for overclocking RAM to achieve higher frequencies. The BIOS provides detailed settings for memory timing and voltage adjustments, ensuring optimal compatibility and stability with AMD Ryzen 7000 series processors.
2.3 Expansion Slots and PCIe Support
The ASUS TUF X670E Plus WiFi features four PCIe 5.0 slots, including one PCIe 5.0 x16 slot for graphics cards and three PCIe 4.0 slots for other expansion cards. It supports dual-GPU configurations with both AMD CrossFire and NVIDIA SLI technologies. The motherboard also includes multiple PCIe x1 slots for additional peripherals like sound cards or Wi-Fi adapters. With PCIe 5.0, users can enjoy faster bandwidth and improved performance for high-speed storage and graphics solutions.
2.4 Connectivity Options (Wi-Fi, LAN, USB, etc.)
The ASUS TUF X670E Plus WiFi offers robust connectivity options, including Wi-Fi 6 for high-speed wireless networking and a 2.5Gb LAN port for reliable wired connections. It features numerous USB ports, such as USB 3.2 Gen 2 and USB-C, ensuring versatile peripheral support. Additionally, the motherboard includes high-quality audio jacks and HDMI/DisplayPort for GPU connectivity. These features ensure seamless integration with modern devices and peripherals, catering to both enthusiasts and professionals.
Installation and Setup
The ASUS TUF X670E Plus WiFi installation involves unboxing, preparing the motherboard, and ensuring hardware compatibility. The process is straightforward with proper preparation and compatible components.
3.1 Unboxing and Preparing the Motherboard
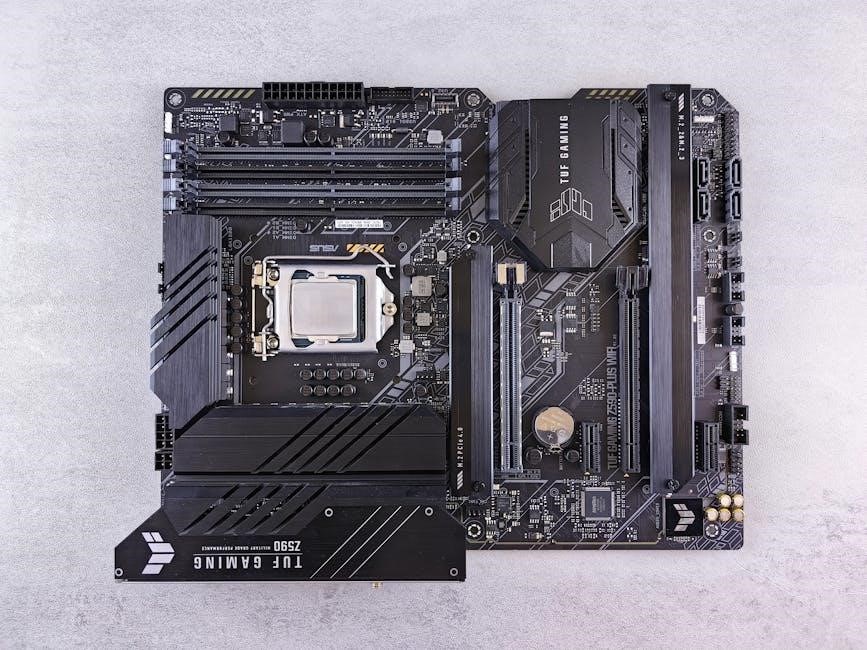
Unboxing the ASUS TUF X670E Plus WiFi motherboard reveals the main board, mounting hardware, and documentation. Carefully inspect for damage and ensure all components are included. Before handling, ground yourself by touching a grounded metal object or wear an anti-static wrist strap to prevent damage from static electricity. Handle the motherboard by the edges to avoid contact with sensitive components. Prepare by installing standalone components like the CPU and RAM before mounting to prevent unnecessary disassembly later.
3.2 Hardware Requirements and Compatibility Check
The ASUS TUF X670E Plus WiFi motherboard is compatible with AMD Ryzen 7000 series processors and supports up to 128GB of DDR5 memory. It features PCIe 5.0 x16 slots for graphics cards and supports NVMe storage drives. Ensure your CPU cooler is compatible with the LGA AM5 socket and that your power supply meets the required specifications. Verify RAM compatibility using the QVL list and check storage devices for SATA or NVMe support. Always refer to ASUS’s official website for the latest compatibility list to ensure seamless performance.
3.3 PC Case Preparation and Mounting
Before installing the ASUS TUF X670E Plus WiFi motherboard, ensure your PC case supports the ATX form factor. Unpack the motherboard and prepare the case by removing unnecessary drive bays. Ground yourself to prevent static damage by touching a grounded metal object or wearing an anti-static strap. Install the motherboard stand-offs if not pre-installed, align the motherboard with the case mounting holes, and secure it using screws designed for motherboards. Gently lower the board, ensuring proper alignment, and tighten the screws evenly. Connect the front panel headers and ensure proper cable management for optimal airflow.
3.4 Installing the Motherboard
Ground yourself to prevent static damage. Align the ASUS TUF X670E Plus WiFi motherboard with the case mounting holes, ensuring proper fitment. Gently lower the board into the case, making sure it sits securely on the stand-offs. Secure the motherboard using the provided screws, tightening them evenly in a star pattern. Connect the power supply, storage drives, and front panel headers. Double-check all connections before closing the case and powering on the system.

BIOS Setup and Navigation
The BIOS provides essential tools for configuring system settings, monitoring hardware, and optimizing performance. Navigate through tabs like Main, Advanced, and Boot to customize preferences securely.
4.1 Accessing the BIOS
To access the BIOS on the ASUS TUF X670E Plus WiFi, restart your system and press the DEL key or F2 during boot. Some systems may require ESC. Ensure the keyboard is connected directly to the motherboard. The BIOS interface will appear, allowing you to configure settings like boot order, time, and overclocking options. Save changes before exiting. If unsure, refer to the motherboard manual or on-screen instructions for the correct key. This step is crucial for system customization and optimization.
4.2 Navigating the BIOS Interface
Navigating the ASUS TUF X670E Plus WiFi BIOS is straightforward. Use arrow keys to move between tabs like Main, Advanced, and Boot. Press Enter to access submenus and adjust settings. Use + or — keys or the mouse wheel to change values. Click Apply to save changes or Exit to discard them. The interface is intuitive, with clear labels for each option. A legend at the bottom often displays key functions, ensuring easy navigation for both novice and experienced users.
4.3 Configuring Basic Settings
In the BIOS, configure basic settings like date, time, and boot order under the Main tab. Set the boot priority in the Boot tab to define the primary drive. Enable or disable legacy USB support if needed. Configure SATA ports and storage devices in the Advanced tab. Use the mouse or arrow keys to navigate and adjust settings. Changes take effect immediately, so review configurations before exiting. These settings ensure proper system initialization and operation.
4.4 Overclocking Options in the BIOS
The ASUS TUF X670E Plus WiFi motherboard offers extensive overclocking options in the BIOS. Access the AI Overclocking or Manual Tuning sections to adjust CPU multipliers, voltage levels, and memory frequencies. Use the Performance Mode for optimized settings or Extreme Mode for aggressive overclocks. Navigate using the mouse or arrow keys to tweak settings precisely. Enable LLC (Load Line Calibration) for stability under heavy loads. These tools empower users to push their system’s performance to the next level safely.
4.5 Saving and Exiting the BIOS
To save changes and exit the BIOS, navigate to the Save & Exit section. Select Save Changes and confirm your selection. The system will restart, applying the new settings. Use the mouse or arrow keys to navigate. Ensure all settings are reviewed before saving. If changes are not needed, select Exit Setup or Discard Changes to reboot without saving. The BIOS will automatically apply saved settings upon the next boot for optimal performance.

Overclocking and Performance Tuning
Optimize CPU and memory performance for enhanced speed and stability. Utilize monitoring tools to ensure reliable overclocking and maintain system integrity.
5.1 CPU Overclocking Guide
Discover how to unlock your CPU’s full potential with the ASUS TUF X670E Plus WiFi. Access the BIOS to adjust CPU multiplier, voltage, and power phase settings. Use AI Overclocking for automatic tuning or manual mode for precise control. Monitor temperatures and stability using built-in tools or third-party software like Prime95. Start with small frequency increases, test stability, and gradually optimize for performance. Ensure proper cooling and power delivery for sustained overclocking. Save profiles for consistent results and avoid excessive voltage to maintain longevity.
5.2 Memory Overclocking and XMP Profiles
Optimize your DDR5 memory performance on the ASUS TUF X670E Plus WiFi by enabling XMP profiles through the BIOS. These profiles automatically configure memory timings and voltage for optimal performance. For manual overclocking, adjust frequency, voltage, and timings in the BIOS under the “Memory” section. Use stress-testing tools like MemTest86 to ensure stability. Start with small increments to avoid instability and monitor temperatures to prevent overheating. Save your custom profiles for consistent performance across reboots.
5.3 Monitoring Tools and Stability Testing
After overclocking, use monitoring tools like HWMonitor or AIDA64 to track temperatures, voltages, and frequencies. Stress-test your system with Prime95 or Cinebench to ensure stability. Monitor memory performance with MemTest86 to detect any errors. Regularly check for BIOS updates and use ASUS AI Overclocking for automated tuning. Record benchmark results to verify improvements and maintain system reliability.
Troubleshooting Common Issues
This section provides solutions for common issues, ensuring system stability. Address problems like boot failures or hardware detection errors. Utilize diagnostic tools and refer to the manual for troubleshooting guides. Contact ASUS support for further assistance if needed.
6.1 Diagnosing Boot Issues
Boot issues can arise from hardware incompatibility or BIOS misconfiguration. Check the power supply, RAM, and GPU connections. Ensure the BIOS is updated and correctly configured. Look for diagnostic LED codes or beep patterns on the motherboard, which indicate specific problems. Reset BIOS to default settings if overclocking or custom configurations were applied. Verify boot order in the BIOS and ensure the primary drive is correctly selected. Contact ASUS support if issues persist after troubleshooting.
6.2 Resolving Memory Compatibility Problems
Memory compatibility issues can cause system instability or failure to boot. Ensure RAM modules are compatible with the ASUS TUF X670E Plus WiFi, as listed in the Qualified Vendor List (QVL). Verify modules are properly seated and configured in the BIOS. Disable overclocking profiles or XMP settings temporarily. Run a memory stress test using tools like MemTest86 to identify faulty modules. If issues persist, reset BIOS to default settings or contact ASUS support for further assistance.
6.3 Fixing Connectivity Issues (Wi-Fi, LAN)
Troubleshoot connectivity issues by first checking physical connections. Ensure the LAN cable is securely plugged in and Wi-Fi is enabled via the BIOS or operating system. Restart the router and modem to refresh the connection. Update network drivers through the ASUS AI Suite or official support website. Reset network settings to default in the BIOS or operating system. Use built-in diagnostic tools to identify and resolve issues. If problems persist, contact ASUS support for further assistance.
6.4 Addressing Overheating Concerns
Monitor CPU and motherboard temperatures using built-in tools like ASUS AI Suite. Ensure proper cooler installation and adequate thermal paste application. Check case airflow by verifying fan configurations and cable management. Enable thermal throttling in the BIOS for auto-adjustments. Clean dust from heatsinks and fans periodically. Avoid overclocking beyond stable limits. Use high-quality thermal pads on VRMs and ensure case fans are operational. If overheating persists, consider upgrading to a better cooling solution or reducing workload demands.
WiFi and Networking Configuration
Configure WiFi settings, install network drivers, and optimize performance for stable connectivity. Enable WiFi in BIOS, set up network adapters, and ensure proper antenna connection for optimal signal strength.
7.1 Setting Up Wi-Fi for the First Time
To set up Wi-Fi on your ASUS TUF X670E Plus WiFi, start by enabling the Wi-Fi feature in the BIOS. Navigate to the Advanced tab, select Onboard Devices Configuration, and ensure Wi-Fi is set to Enabled. Save changes and exit. Once booted into your OS, connect to your desired network via the Wi-Fi adapter. Install the latest Wi-Fi drivers from the ASUS support website for optimal performance. Ensure antennas are properly connected for the best signal strength.
7.2 Managing Network Adapters and Drivers
Managing network adapters and drivers on the ASUS TUF X670E Plus WiFi ensures optimal connectivity. Open Device Manager, locate Network Adapters, and verify the Wi-Fi and LAN drivers are installed. Update drivers via ASUS Armory Crate or download the latest versions from the ASUS website. Disable and re-enable adapters if experiencing issues. Use the built-in Windows Network Reset tool to restore default settings and resolve conflicts without affecting other system configurations.
7.3 Optimizing Network Performance
To optimize network performance on the ASUS TUF X670E Plus WiFi, enable QoS settings in the BIOS or through ASUS AI Network Tools. Prioritize gaming or streaming traffic for reduced latency. Use the 6GHz band for faster speeds and less congestion. Update network drivers via ASUS Armory Crate or the official website. Adjust Wi-Fi channel widths and enable MU-MIMO for improved wireless efficiency. Ensure the router is centrally located and reduce interference from nearby devices for stable connections.

Power Management and Efficiency
The ASUS TUF X670E Plus WiFi features advanced power management, including intelligent power delivery and energy-efficient VRMs. Configurable power modes optimize performance or prioritize efficiency, while monitoring tools track consumption for better system optimization.
8.1 Understanding Power Delivery Systems
The ASUS TUF X670E Plus WiFi features a robust power delivery system designed for stable and efficient power distribution. It utilizes high-quality VRMs (Voltage Regulator Modules) and capacitors to ensure consistent power delivery to the CPU and other components. The motherboard supports intelligent power management, balancing performance and efficiency. This system is crucial for maintaining system stability, especially during intense workloads or overclocking. Understanding these components helps users optimize their build for reliability and long-term performance.
8.2 Configuring Power Saving Features
The ASUS TUF X670E Plus WiFi offers power-saving features to optimize energy efficiency without sacrificing performance. Users can enable power-saving modes in the BIOS, such as EPU (Energy Processing Unit) profiles, to balance performance and energy use. Additionally, hardware-level controls allow disabling unused ports or adjusting fan speeds to minimize power draw. These settings help reduce energy consumption while maintaining system reliability, making it ideal for both everyday use and eco-conscious setups.
8.3 Monitoring Power Consumption
The ASUS TUF X670E Plus WiFi motherboard includes tools to monitor power consumption in real time. Through the BIOS or companion software like AI Suite, users can track CPU, GPU, and overall system power draw. Customizable thresholds and alerts ensure optimal energy use. Hardware sensors provide detailed insights, while software integration allows for historical data analysis. This feature helps users balance performance and efficiency, ensuring stable operation while minimizing energy waste.

RGB Lighting and Customization
The ASUS TUF X670E Plus WiFi features customizable RGB lighting through Aura Sync, allowing users to personalize lighting effects, sync with compatible devices, and create unique aesthetics.
9.1 Controlling Aura Sync RGB Lighting
Control Aura Sync RGB lighting on the ASUS TUF X670E Plus WiFi through the ASUS Aura software. Install the software from the official website or the provided CD. Connect RGB strips to the designated headers on the motherboard, ensuring compatibility. Customize lighting effects like static colors or breathing patterns. Sync with other Aura Sync devices for a unified look. Adjust brightness and color settings to match your setup. Use keyboard shortcuts for easy control, and ensure firmware is updated for optimal performance.
9.2 Customizing Lighting Effects
Customize lighting effects on the ASUS TUF X670E Plus WiFi using Aura Sync software. Access various lighting modes like Rainbow, Comet, and Breathing. Choose from a spectrum of colors and adjust animation speeds. Select multiple color palettes for dynamic transitions. Sync lighting effects with music or system temperatures for immersive experiences. Save custom profiles for quick access. Adjust brightness levels to enhance visual appeal. Ensure firmware updates for expanded customization options and compatibility with Aura Sync devices.
9.3 Synchronizing with Other Aura Sync Devices
Synchronize your ASUS TUF X670E Plus WiFi motherboard with other Aura Sync devices for a unified lighting experience. Use the Aura Sync software to connect compatible peripherals and components via USB or wireless. Adjust settings to match lighting effects, colors, and animations across all devices. Ensure firmware updates for seamless integration. This feature enhances aesthetics and creates a harmonious RGB setup, making your system stand out with coordinated visuals.

Software and Driver Installation
Install essential drivers and software for ASUS TUF X670E Plus WiFi to ensure optimal performance and compatibility. Use ASUS-provided utilities for smooth system optimization and updates.
10.1 Pre-Installed Software Overview
The ASUS TUF X670E Plus WiFi motherboard comes with pre-installed software utilities designed to enhance system performance and customization. These include tools for system monitoring, RGB lighting control, and network management. Users can access these utilities through platforms like ASUS Armory Crate or AI Suite, ensuring a seamless experience. The software is optimized to work alongside the motherboard’s features, providing users with comprehensive control over their system’s functionality and aesthetics.
10.2 Installing Drivers for Optimal Performance
Installing the correct drivers is essential for unlocking the motherboard’s full potential. Drivers for the ASUS TUF X670E Plus WiFi can be downloaded from the official ASUS website or found on the included CD. Key drivers include the chipset, audio, and LAN drivers, which ensure proper system functionality. Users should install these drivers in the recommended order to maintain compatibility and stability. Additionally, ASUS Armory Crate can be used to manage and update drivers seamlessly for optimal performance.
10.3 Updating Firmware and BIOS
Updating the BIOS and firmware ensures optimal performance and compatibility with the latest hardware. Users can update the BIOS using ASUS EZ Flash Utility, accessible via the BIOS interface. Download the latest BIOS version from the ASUS website, save it to a USB drive, and follow the on-screen instructions. Firmware updates for other components, like Wi-Fi adapters, can be installed through the ASUS AI Suite or Armoury Crate software. Always backup data and ensure a stable power supply during updates.

Maintenance and Support
Regular maintenance ensures longevity and optimal performance. Cleaning the motherboard, updating drivers, and checking for firmware updates are essential. ASUS provides comprehensive support resources.
11.1 Cleaning and Maintaining the Motherboard
Regular cleaning prevents dust buildup and ensures optimal performance. Ground yourself to avoid static damage. Use compressed air to gently remove dust from heatsinks and components. Avoid liquids, as they can damage electronics. Inspect for loose connections and secure them. Use a soft brush for delicate areas. Wipe the case with a dry cloth. Ensure proper airflow by cleaning case fans. Regular maintenance prevents overheating and extends the motherboard’s lifespan.
11.2 Warranty Information and Support Options
The ASUS TUF X670E Plus WiFi motherboard is backed by a limited warranty, typically covering defects for up to 3 years. Register your product on the ASUS website to ensure coverage. The warranty includes repairs or replacements for faulty components. For support, visit the ASUS website for driver downloads, user manuals, and troubleshooting guides. Contact customer support via live chat, email, or phone for assistance. Extended warranty options may be available for added protection.
11.3 Contacting ASUS Customer Support
For assistance with the ASUS TUF X670E Plus WiFi motherboard, contact ASUS Customer Support through multiple channels. Visit the official ASUS website and navigate to the support section for live chat, email, or phone options. Ensure to have your motherboard’s serial number ready for faster service. Additionally, explore the ASUS Support website for FAQs, troubleshooting guides, and driver downloads. Regional support hotlines are available for localized assistance. Online forums and community resources also provide peer-to-peer support for common issues.