Miller XMT 304 CC/CV: An Overview
The Miller XMT 304 CC/CV is a versatile‚ industrial-grade power source designed for a broad spectrum of welding applications‚ offering both constant current and voltage outputs.
What is the Miller XMT 304?
The Miller XMT 304 CC/CV is a highly capable and widely utilized industrial welding machine. It’s a multi-process welder‚ meaning it can handle several different welding techniques‚ making it a valuable asset in diverse fabrication environments.
Specifically‚ “CC/CV” denotes its ability to operate in both Constant Current and Constant Voltage modes. This flexibility allows for precision in processes like TIG and Stick welding (CC) and efficiency in MIG and Flux-Cored welding (CV).
Built with robust components and inverter technology‚ the XMT 304 delivers stable arc performance and reliable operation. It’s known for its portability‚ making it suitable for both shop and field work. The machine is designed for professional welders tackling demanding projects‚ offering a balance of power‚ control‚ and durability.
Key Features and Specifications
The Miller XMT 304 CC/CV boasts several key features; Its output range is 30-300 amps‚ accommodating various material thicknesses. Input voltage is typically 208-230V/460V‚ offering installation flexibility. It features true dual voltage capability for convenience.
Duty cycle at 300 amps and 60% is impressive‚ ensuring sustained welding performance. The machine weighs approximately 82 lbs‚ balancing portability with stability; It supports gas metal arc welding (GMAW)‚ shielded metal arc welding (SMAW)‚ gas tungsten arc welding (GTAW)‚ and flux-cored arc welding (FCAW).
Furthermore‚ it includes built-in digital meters for precise amperage and voltage readings. Its advanced inverter technology delivers a clean and focused arc‚ enhancing weld quality and reducing spatter. The XMT 304 is truly a versatile and powerful welding solution.

Understanding the Control Panel
The Miller XMT 304 CC/CV’s control panel provides intuitive access to essential welding parameters‚ ensuring precise adjustments for optimal performance and control.
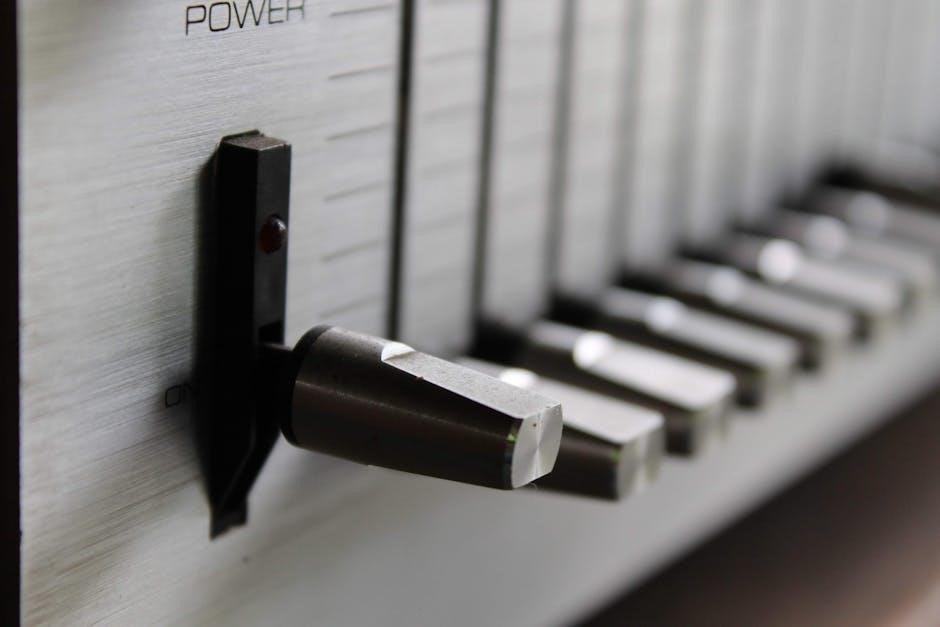
Main Power Switch & Indicators
The main power switch‚ prominently located on the front panel‚ activates and deactivates the entire welding power source. Ensure the switch is in the “OFF” position before connecting or disconnecting any power cables.
Several indicator lights provide crucial operational status information. The “Power” indicator illuminates when the unit is energized‚ confirming power supply. A “Thermal Overload” indicator signals that the machine has reached its temperature limit and requires cooling before resuming operation.
The “Check Input Power” light alerts the user to potential issues with the incoming electrical supply‚ such as incorrect voltage or phase. Finally‚ a “Gas” indicator (when applicable‚ depending on the setup) confirms the availability of shielding gas for TIG or MIG welding processes. Regularly monitoring these indicators is vital for safe and efficient operation.
Voltage and Amperage Controls
The Miller XMT 304 CC/CV features clearly labeled and calibrated controls for both voltage and amperage adjustment. These knobs allow precise manipulation of the welding parameters to suit various materials and thicknesses.
Amperage control‚ primarily used in Constant Current (CC) mode‚ dictates the welding current‚ influencing penetration and arc characteristics. Higher amperage values are generally used for thicker materials.
Voltage control‚ crucial in Constant Voltage (CV) mode‚ regulates the arc voltage‚ affecting weld bead profile and deposition rate. Adjusting voltage impacts arc length and stability. Fine-tuning both controls is essential for achieving optimal weld quality. Remember to consult welding charts for recommended settings based on material type and joint configuration.
Mode Selector (CC/CV)
The Miller XMT 304 CC/CV’s mode selector switch is a central component‚ enabling the operator to choose between Constant Current (CC) and Constant Voltage (CV) operation. This switch fundamentally alters the machine’s output characteristics.
In CC mode‚ the amperage remains relatively constant‚ even with variations in arc length‚ making it ideal for processes like Stick (SMAW) and TIG (GTAW) where consistent current is paramount for penetration control.
CV mode‚ conversely‚ maintains a stable voltage‚ adjusting amperage as arc length changes. This is best suited for MIG (GMAW) and Flux-Cored (FCAW) welding‚ ensuring a stable arc and consistent bead deposition. Proper mode selection is critical for successful welding.

CC (Constant Current) Mode – Detailed Guide
Constant Current (CC) mode excels in applications demanding precise arc control‚ notably Stick and TIG welding‚ prioritizing consistent amperage delivery for quality welds.
Stick (SMAW) Welding with CC Mode
Shielded Metal Arc Welding (SMAW)‚ commonly known as stick welding‚ thrives in CC mode due to its need for a stable arc length. The Miller XMT 304’s CC output maintains consistent amperage‚ even with variations in arc distance‚ crucial for managing the molten weld pool.
Begin by selecting the appropriate electrode for your material and thickness. Adjust the amperage based on the electrode manufacturer’s recommendations – typically found on the packaging. A lower amperage is suitable for thinner materials‚ while thicker materials require higher settings.
Strike an arc using a scratching or tapping motion. Maintain a short arc length for optimal penetration and weld quality. Observe the arc characteristics; a crackling or unstable arc indicates an incorrect amperage setting. Practice proper travel speed to create a consistent bead. Remember to account for joint preparation and welding position when fine-tuning your parameters.
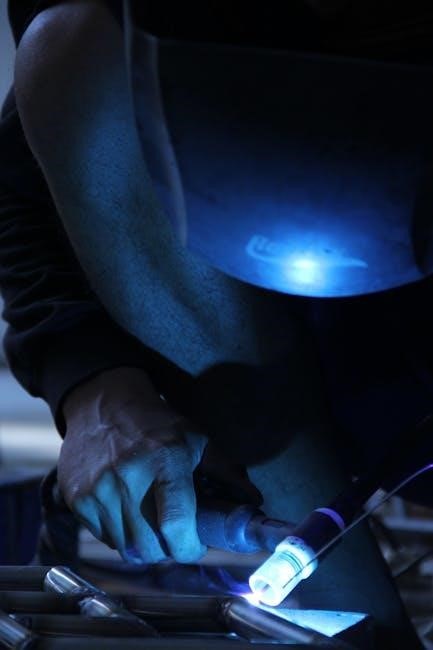
TIG (GTAW) Welding with CC Mode – Gas & Electrode Selection
Gas Tungsten Arc Welding (GTAW)‚ or TIG welding‚ demands precise control‚ making CC mode ideal. Selecting the correct shielding gas and tungsten electrode is paramount for weld quality. Argon is the most common shielding gas‚ providing excellent arc stability and preventing contamination. For specific alloys‚ helium or argon/helium mixtures may be preferred.
Tungsten electrode selection depends on the material being welded and the amperage range. 2% thoriated tungsten is versatile‚ while ceriated or lanthanated electrodes offer alternatives. Sharpen the tungsten to a point for DCEN (Direct Current Electrode Negative) polarity‚ commonly used for steel and stainless steel.

Ensure proper gas flow rate (typically 15-20 CFH) and a clean welding environment. Adjust the amperage to achieve the desired arc characteristics and penetration‚ referencing a welding chart for your material and thickness.
Adjusting Current for Different Materials (CC)
In Constant Current (CC) mode‚ amperage dictates heat input‚ crucial for varying materials. Steel generally requires higher amperage than aluminum for similar thicknesses. Thinner materials necessitate lower amperage to prevent burn-through‚ while thicker sections demand increased amperage for adequate penetration.
Start with a lower amperage setting and incrementally increase it until a stable arc and desired weld pool are achieved. For stainless steel‚ reduce amperage slightly compared to carbon steel. When welding cast iron‚ use the lowest possible amperage to minimize heat affected zone cracking.
Refer to welding charts as a starting point‚ but always perform test welds to fine-tune the amperage for optimal results. Consider the joint design and welding position when making adjustments.

CV (Constant Voltage) Mode – Detailed Guide
Constant Voltage (CV) mode excels in applications like MIG and Flux-Cored welding‚ maintaining a stable arc length regardless of variations in wire feed speed.
MIG (GMAW) Welding with CV Mode
MIG (Gas Metal Arc Welding)‚ utilizing the XMT 304’s CV mode‚ is renowned for its speed and efficiency‚ making it ideal for production welding and general fabrication. Proper setup involves selecting the correct wire type and diameter based on the material being welded – steel‚ stainless steel‚ or aluminum each require specific considerations.
The XMT 304’s CV output ensures a consistent arc length‚ simplifying the welding process‚ especially for beginners. Key parameters to adjust include wire feed speed‚ voltage‚ and gas flow rate. Higher wire feed speeds generally require increased voltage to maintain a stable arc. Argon and CO2 mixtures are commonly used shielding gases‚ with the specific blend tailored to the material and desired weld characteristics. Remember to purge the gas line before starting to eliminate contaminants.
Flux-Cored Arc Welding (FCAW) with CV Mode
Flux-Cored Arc Welding (FCAW)‚ also operating within the XMT 304’s CV mode‚ provides a robust welding process suitable for thicker materials and outdoor applications where shielding gas coverage might be compromised. Unlike MIG‚ FCAW utilizes a tubular wire containing a flux that generates its own shielding gas‚ eliminating the need for an external gas supply in some cases.
The XMT 304 allows for both self-shielded and gas-shielded FCAW techniques. Self-shielded FCAW is preferred for portability and windy conditions‚ while gas-shielded FCAW offers cleaner welds with better mechanical properties. Adjusting the voltage and wire feed speed is crucial for achieving optimal penetration and bead profile. Proper electrode angle and travel speed are also vital for a sound weld. Always consult the wire manufacturer’s recommendations for specific parameter settings.
Wire Feed Speed & Voltage Relationship (CV)
In Constant Voltage (CV) mode‚ particularly during MIG and FCAW processes with the Miller XMT 304‚ understanding the relationship between wire feed speed and voltage is paramount for weld quality. Increasing wire feed speed generally increases amperage and deposition rate‚ leading to a wider and flatter bead. Conversely‚ decreasing wire feed speed lowers amperage‚ resulting in a narrower and more penetrating bead.
Voltage primarily controls the arc length and weld puddle fluidity. Higher voltage creates a longer arc‚ wider bead‚ and increased penetration‚ but can also lead to porosity if excessive. Lower voltage shortens the arc‚ narrows the bead‚ and reduces penetration. Finding the sweet spot involves balancing these parameters based on material thickness‚ joint design‚ and desired weld characteristics. Fine-tuning both settings simultaneously is often necessary for optimal results.

Safety Precautions & Best Practices
Prioritize safety when operating the Miller XMT 304; always wear appropriate PPE‚ ensure proper ventilation‚ and follow electrical safety guidelines diligently.
Electrical Safety Guidelines
Electrical hazards are present when working with the Miller XMT 304. Always inspect cables for damage before use‚ replacing any frayed or cracked coverings immediately. Ensure the machine is properly grounded using a dedicated grounding wire connected to a known earth ground.
Never touch electrically live parts or electrodes. Wear dry‚ insulated welding gloves and clothing to prevent electrical shock. Disconnect input power before performing any maintenance or troubleshooting. Avoid welding in damp or wet environments‚ as this significantly increases shock risk.
Be aware of your surroundings and ensure no personnel are within the welding arc’s range. Use insulated electrode holders and work clamps. Regularly check connections for tightness and corrosion. If you experience any electrical shock‚ immediately disconnect power and seek medical attention.
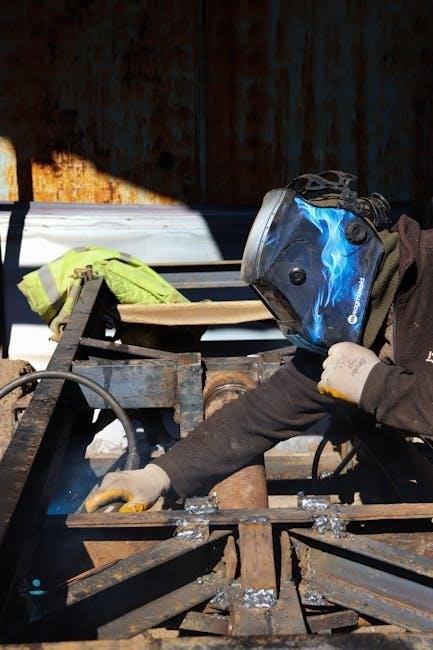
Proper Ventilation & PPE
Welding processes generate fumes and gases that can be hazardous to your health. Adequate ventilation is crucial; work in a well-ventilated area or use local exhaust ventilation to remove fumes from the breathing zone. Avoid breathing welding fumes‚ as they contain particles that can cause respiratory irritation and long-term health problems.
Personal Protective Equipment (PPE) is essential. Always wear an approved welding helmet with the correct shade lens to protect your eyes and face from the intense arc radiation. Wear appropriate clothing‚ such as a welding jacket and pants‚ to shield your skin from burns.
Use safety glasses with side shields under your helmet for added protection. Wear closed-toe shoes and gloves. A respirator may be necessary when welding certain materials or in poorly ventilated areas. Protect others in the area with welding screens.
Routine Maintenance & Troubleshooting
Regular maintenance extends the life of your Miller XMT 304. Periodically inspect power and ground cables for damage‚ and clean the terminals to ensure good connections. Check the cooling system – fans and air filters – for obstructions and clean as needed to prevent overheating. Inspect gas hoses for leaks when using TIG or MIG processes.
Troubleshooting common issues often starts with simple checks. If the machine doesn’t power on‚ verify the input power source and circuit breaker. For arc stability problems‚ check work clamp connections and electrode type. Low output voltage could indicate a faulty rectifier or transformer.
Consult the Miller XMT 304’s detailed troubleshooting guide in the full manual for specific error codes and solutions. If issues persist‚ contact a qualified Miller service technician.

Advanced Techniques & Settings
Unlock the XMT 304’s full potential with pulse welding‚ remote control capabilities‚ and fine-tuning settings for specialized applications and optimal weld quality.
Pulse Welding Capabilities
The Miller XMT 304 CC/CV offers sophisticated pulse welding functionality‚ enabling precise control over heat input and weld bead characteristics. Pulse welding is particularly beneficial when working with thinner materials or when a high-quality‚ aesthetically pleasing weld is required.
By alternating between peak and background current levels‚ pulse welding minimizes distortion and reduces the risk of burn-through. Key parameters to adjust include peak current‚ background current‚ pulse frequency‚ and pulse duty cycle. Experimenting with these settings allows welders to tailor the welding process to specific materials and joint configurations.
Utilizing pulse settings enhances control during out-of-position welding and improves weld puddle control‚ resulting in stronger‚ cleaner welds. The XMT 304’s pulse features are accessible through the control panel‚ providing intuitive adjustments for optimized performance.

Remote Control Options
The Miller XMT 304 CC/CV is compatible with several remote control options‚ significantly enhancing operator convenience and welding precision‚ especially in extended or difficult-to-access welding scenarios. A common choice is the Cool-Mate™ series remote foot control‚ allowing for amperage adjustments directly at the weld point without returning to the machine.
These remote controls connect via a dedicated 14-pin connector‚ providing reliable and responsive control. Wireless remote options are also available‚ offering greater freedom of movement and eliminating cable clutter. Utilizing a remote control improves weld quality by enabling real-time adjustments based on the evolving weld puddle.

Proper setup and calibration of the remote control are crucial for optimal performance. Refer to the Miller documentation for specific instructions on connecting and configuring the chosen remote control accessory.
Troubleshooting Common Issues
Common issues with the Miller XMT 304 CC/CV often involve power input problems – check breakers‚ cords‚ and the power receptacle. If experiencing unstable arc output‚ verify gas flow (for TIG/MIG) and ensure proper workpiece grounding. Overheating can occur with insufficient cooling or blocked vents; inspect the cooling system and airflow.
Error codes displayed on the front panel provide valuable diagnostic information; consult the manual for specific code meanings and recommended actions. If the machine fails to start‚ check the main power switch and safety interlocks. For wire feed issues in CV mode‚ inspect the drive rolls‚ guide tubes‚ and contact tip.
Always disconnect power before performing any internal inspections or repairs. If problems persist‚ contact a qualified Miller service technician.